CC Switch Guide: Configure Claude Code with APIBox and Switch Between 3 Model Setups
A practical CC Switch guide using Claude Code as the example. Learn how to configure APIBox inside CC Switch and create three separate model setups for Claude, GPT, and Gemini.
If you use Claude Code but do not want to keep editing environment variables, config files, and provider endpoints by hand, CC Switch is a very practical graphical entry point.
This guide stays focused on one real workflow: Claude Code + APIBox.
We will cover three things:
- how to add an APIBox provider inside CC Switch
- how to bind that provider to Claude Code
- how to create three separate model setups for Claude / GPT / Gemini
Different AI coding tools all use different config formats. Once you start switching providers manually, it becomes very easy to break JSON, TOML, or .env files.
That is where CC Switch becomes useful. It is not a model platform by itself. It is a desktop manager for provider configs, MCP, Skills, Prompts, and related tooling across AI CLIs.
Project URL: farion1231/cc-switch
1. The short version
CC Switch is mainly solving a configuration management problem, not a model capability problem.
It supports tools such as:
- Claude Code
- Codex
- Gemini CLI
- OpenCode
- OpenClaw
Its real value is simple:
- faster provider switching
- less manual config editing
- clearer separation between setups
- easier rollback and troubleshooting
If you switch between multiple AI CLI tools or multiple providers often, it is genuinely useful.
2. Who this is for
This setup is especially useful if:
- you use Claude Code + Codex together
- you switch between official accounts, relay services, or custom endpoints
- you want one place to manage MCP, Skills, and Prompts
- you prefer not to hand-edit config files all the time
- you use OpenClaw and want less low-level config work
If you only use one CLI tool and almost never switch providers, the value is smaller.
3. The end state: one Claude Code UI, three model setups
Here is the practical end state you want inside CC Switch:
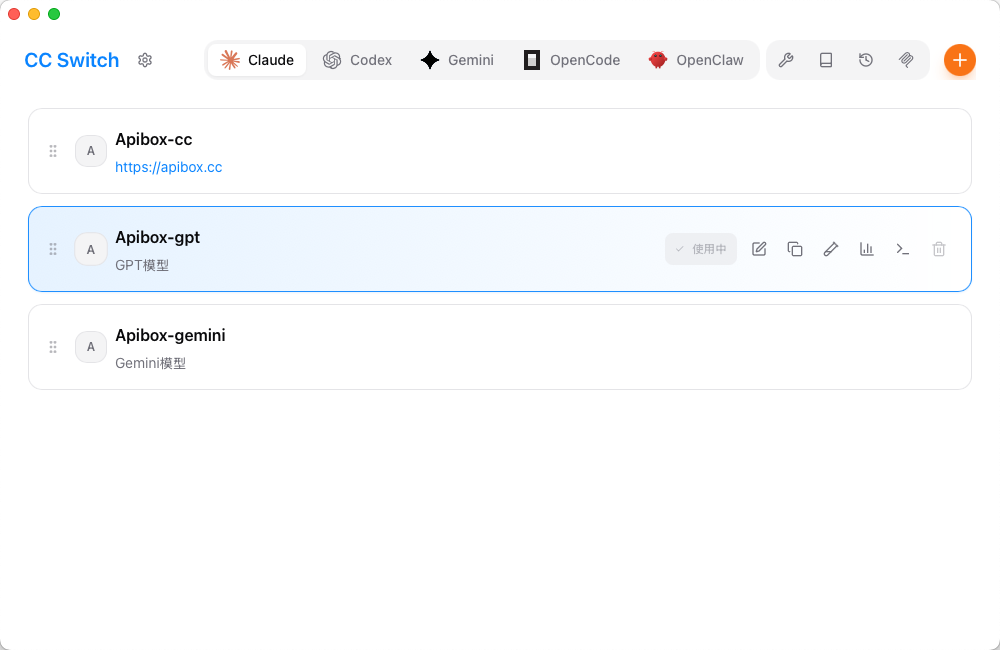
The structure is straightforward:
- Apibox-cc: for Claude models
- Apibox-gpt: for GPT models
- Apibox-gemini: for Gemini models
Why split them this way?
- Switching is faster — no need to edit environment variables every time
- Each setup is obvious — you immediately know which model route Claude Code is using
- Troubleshooting is simpler — if one route breaks, you only inspect that provider
If you often switch between Claude, GPT, and Gemini, this is much cleaner than stuffing everything into one provider config.
4. First, add a Claude Code provider
Start with the Claude-oriented provider.
Inside CC Switch, select the Claude tool and create or edit a provider like this:
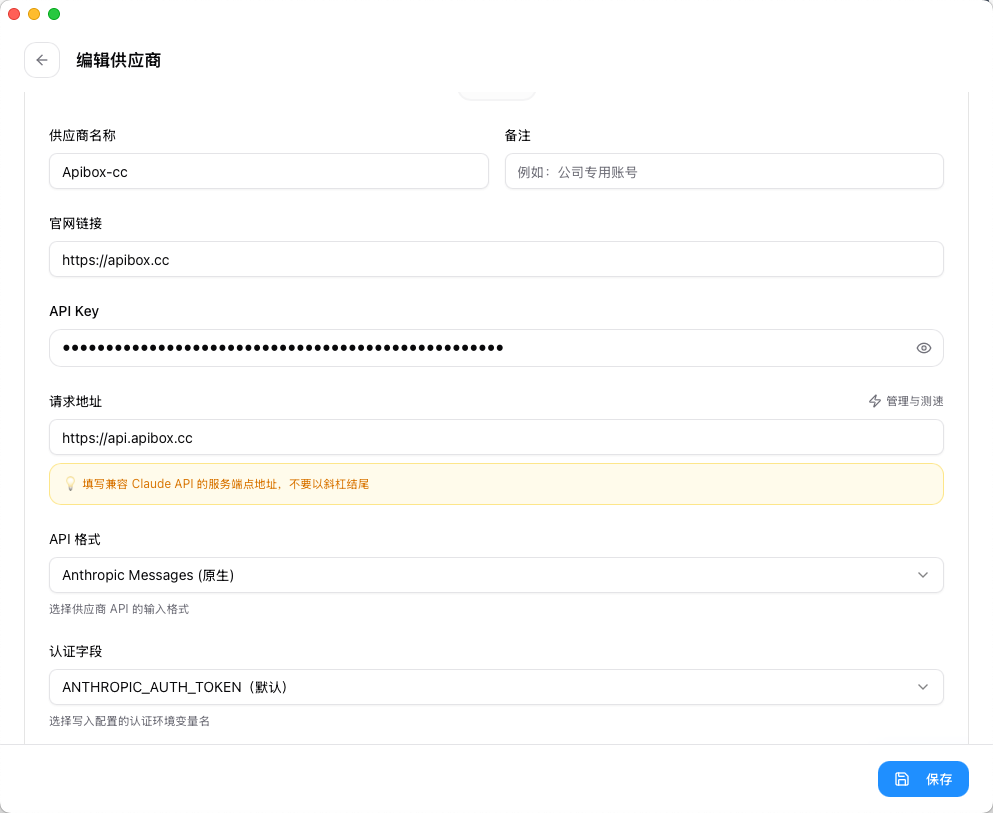
The key fields are:
- Provider Name: use a purpose-based name such as
Apibox-cc - Website URL:
https://apibox.cc - API Key: your APIBox key
- Request URL:
https://api.apibox.cc - API Format:
Anthropic Messages (native) - Auth Field: keep the default
ANTHROPIC_AUTH_TOKEN
Two important details
1) Do not use the OpenAI-compatible /v1 endpoint in this Claude Code example
Based on your screenshot, this setup is using Anthropic Messages (native).
So the request URL should be:
https://api.apibox.ccNot:
https://api.apibox.cc/v1Why? Because this example is configuring Claude Code with the native Anthropic-style API format, not the generic OpenAI-compatible format.
2) Name providers by purpose
Use names like these:
Apibox-ccApibox-gptApibox-gemini
Do not name every provider just “APIBox,” or switching later becomes annoying and error-prone.
5. How the model section works in Claude Code
After the provider basics are filled in, move to the model section.
Your screenshot shows fields such as:
- main model
- thinking model
- default Haiku model
- default Sonnet model
- default Opus model
A blank-state example looks like this:
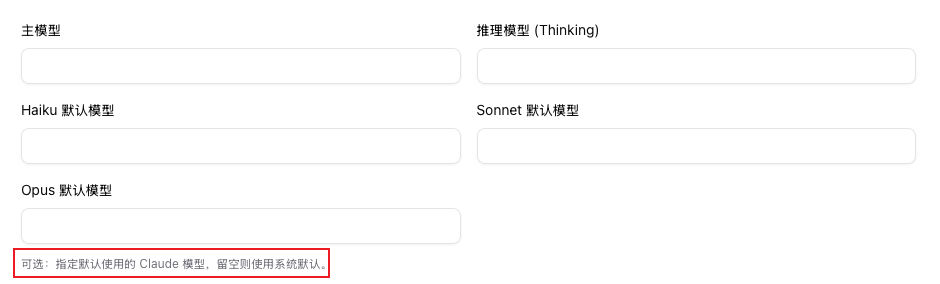
The logic is simple:
- if you leave it blank, Claude Code relies more on defaults
- if you fill it in, you are explicitly defining a model mapping inside CC Switch
If you want real multi-model switching, this is the key area.
6. Setup A: use GPT models inside Claude Code
If you want Claude Code to run on GPT-family models, configure it like this:
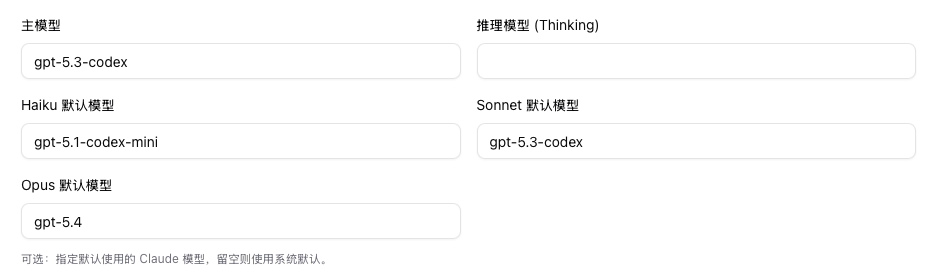
How to read this setup
- Main model:
gpt-5.3-codex - Default Haiku model:
gpt-5.1-codex-mini - Default Sonnet model:
gpt-5.3-codex - Default Opus model:
gpt-5.4 - Thinking model: optional, depending on how you want to use it
Who this setup fits
This makes sense if:
- you want GPT-family behavior inside the Claude Code workflow
- you care more about GPT / Codex coding performance for certain tasks
- you want to keep one familiar CLI workflow while switching model families underneath
Recommended provider name
Save this as:
Apibox-gptThat makes the route obvious in the provider list.
7. Setup B: use Gemini models inside Claude Code
If you want Claude Code to run on Gemini models, use a setup like this:
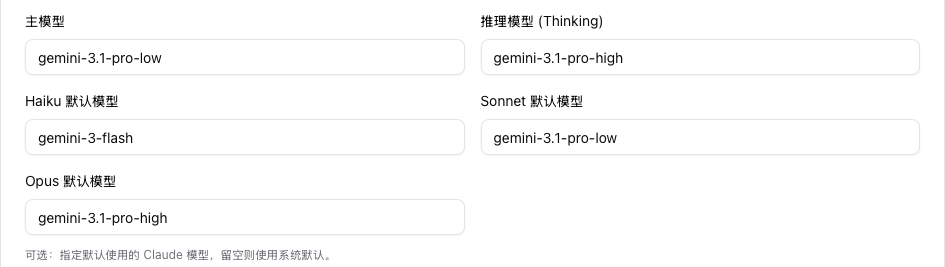
How to read this setup
- Main model:
gemini-3.1-pro-low - Thinking model:
gemini-3.1-pro-high - Default Haiku model:
gemini-3-flash - Default Sonnet model:
gemini-3.1-pro-low - Default Opus model:
gemini-3.1-pro-high
Who this setup fits
This makes sense if:
- you want to keep Claude Code as the interface
- but actually route requests to Gemini-family models
- you want a cleaner separation between light, standard, and stronger reasoning tiers
Recommended provider name
Save this as:
Apibox-gemini8. Setup C: keep one route for Claude-native models
From your naming pattern, the third setup is:
Apibox-ccThat provider is the one you keep for Claude-native usage.
Even though your screenshots do not expand the detailed Claude-native model values, the strategy is straightforward:
- keep one provider for Claude
- one for GPT
- one for Gemini
This is much better than merging all three routes into one provider because:
- switching stays clear
- maintenance is easier
- accidental misconfiguration is less likely
- rollback is faster when something breaks
9. The setup I actually recommend
If you want to connect Claude Code to APIBox today, do it this way.
Step 1: create three providers
Apibox-ccApibox-gptApibox-gemini
Step 2: point all three to the same APIBox account system
Use the same shared basics:
- Website URL:
https://apibox.cc - Request URL:
https://api.apibox.cc - API Key: your APIBox key
Then only change the model mappings.
Step 3: switch by task
A practical split is:
- Apibox-cc: default daily coding route
- Apibox-gpt: switch here when you specifically want GPT / Codex-style behavior
- Apibox-gemini: switch here when you want Gemini routing or a different cost/performance tradeoff
10. Why this setup is better in practice
The value is not just “it works.” The value is that it stays manageable later.
- model routing is clearer
- Claude Code remains the same working interface
- one APIBox account system can carry multiple model routes
- you do not need to hand-edit low-level config files every time
- debugging becomes easier because each provider has a clear purpose
11. Installation
According to the official project, CC Switch supports:
- Windows 10+
- macOS 12+
- Ubuntu 22.04+ / Debian 11+ / Fedora 34+ and other mainstream Linux distributions
macOS
The easiest macOS installation path is:
brew tap farion1231/ccswitch
brew install --cask cc-switch
If you do not want to use Homebrew, download it directly from GitHub Releases:
Windows
Windows users can download either:
- the
.msiinstaller - or the portable ZIP version
Linux
For Linux, the official release page is usually the safest option.
12. Common mistakes
1) Mixing the request URL format
In this specific Claude Code example, you are using the native Anthropic Messages route.
So the request URL is:
https://api.apibox.ccNot /v1.
2) Naming providers too loosely
If you create multiple providers but give them all vague names, switching gets messy fast.
Use purpose-based names.
3) Changing everything at once
Do not try to optimize every model field on day one.
First make one route work, then split into three.
Try it now, sign up and start using 30+ models with one API key
Sign up free →